
Overview
Over the past year I built out a proper home network from scratch using enterprise-grade Ubiquiti hardware. The goal was security, performance, and full smart-home automation - without relying on cloud services.
Network Architecture - VLANs
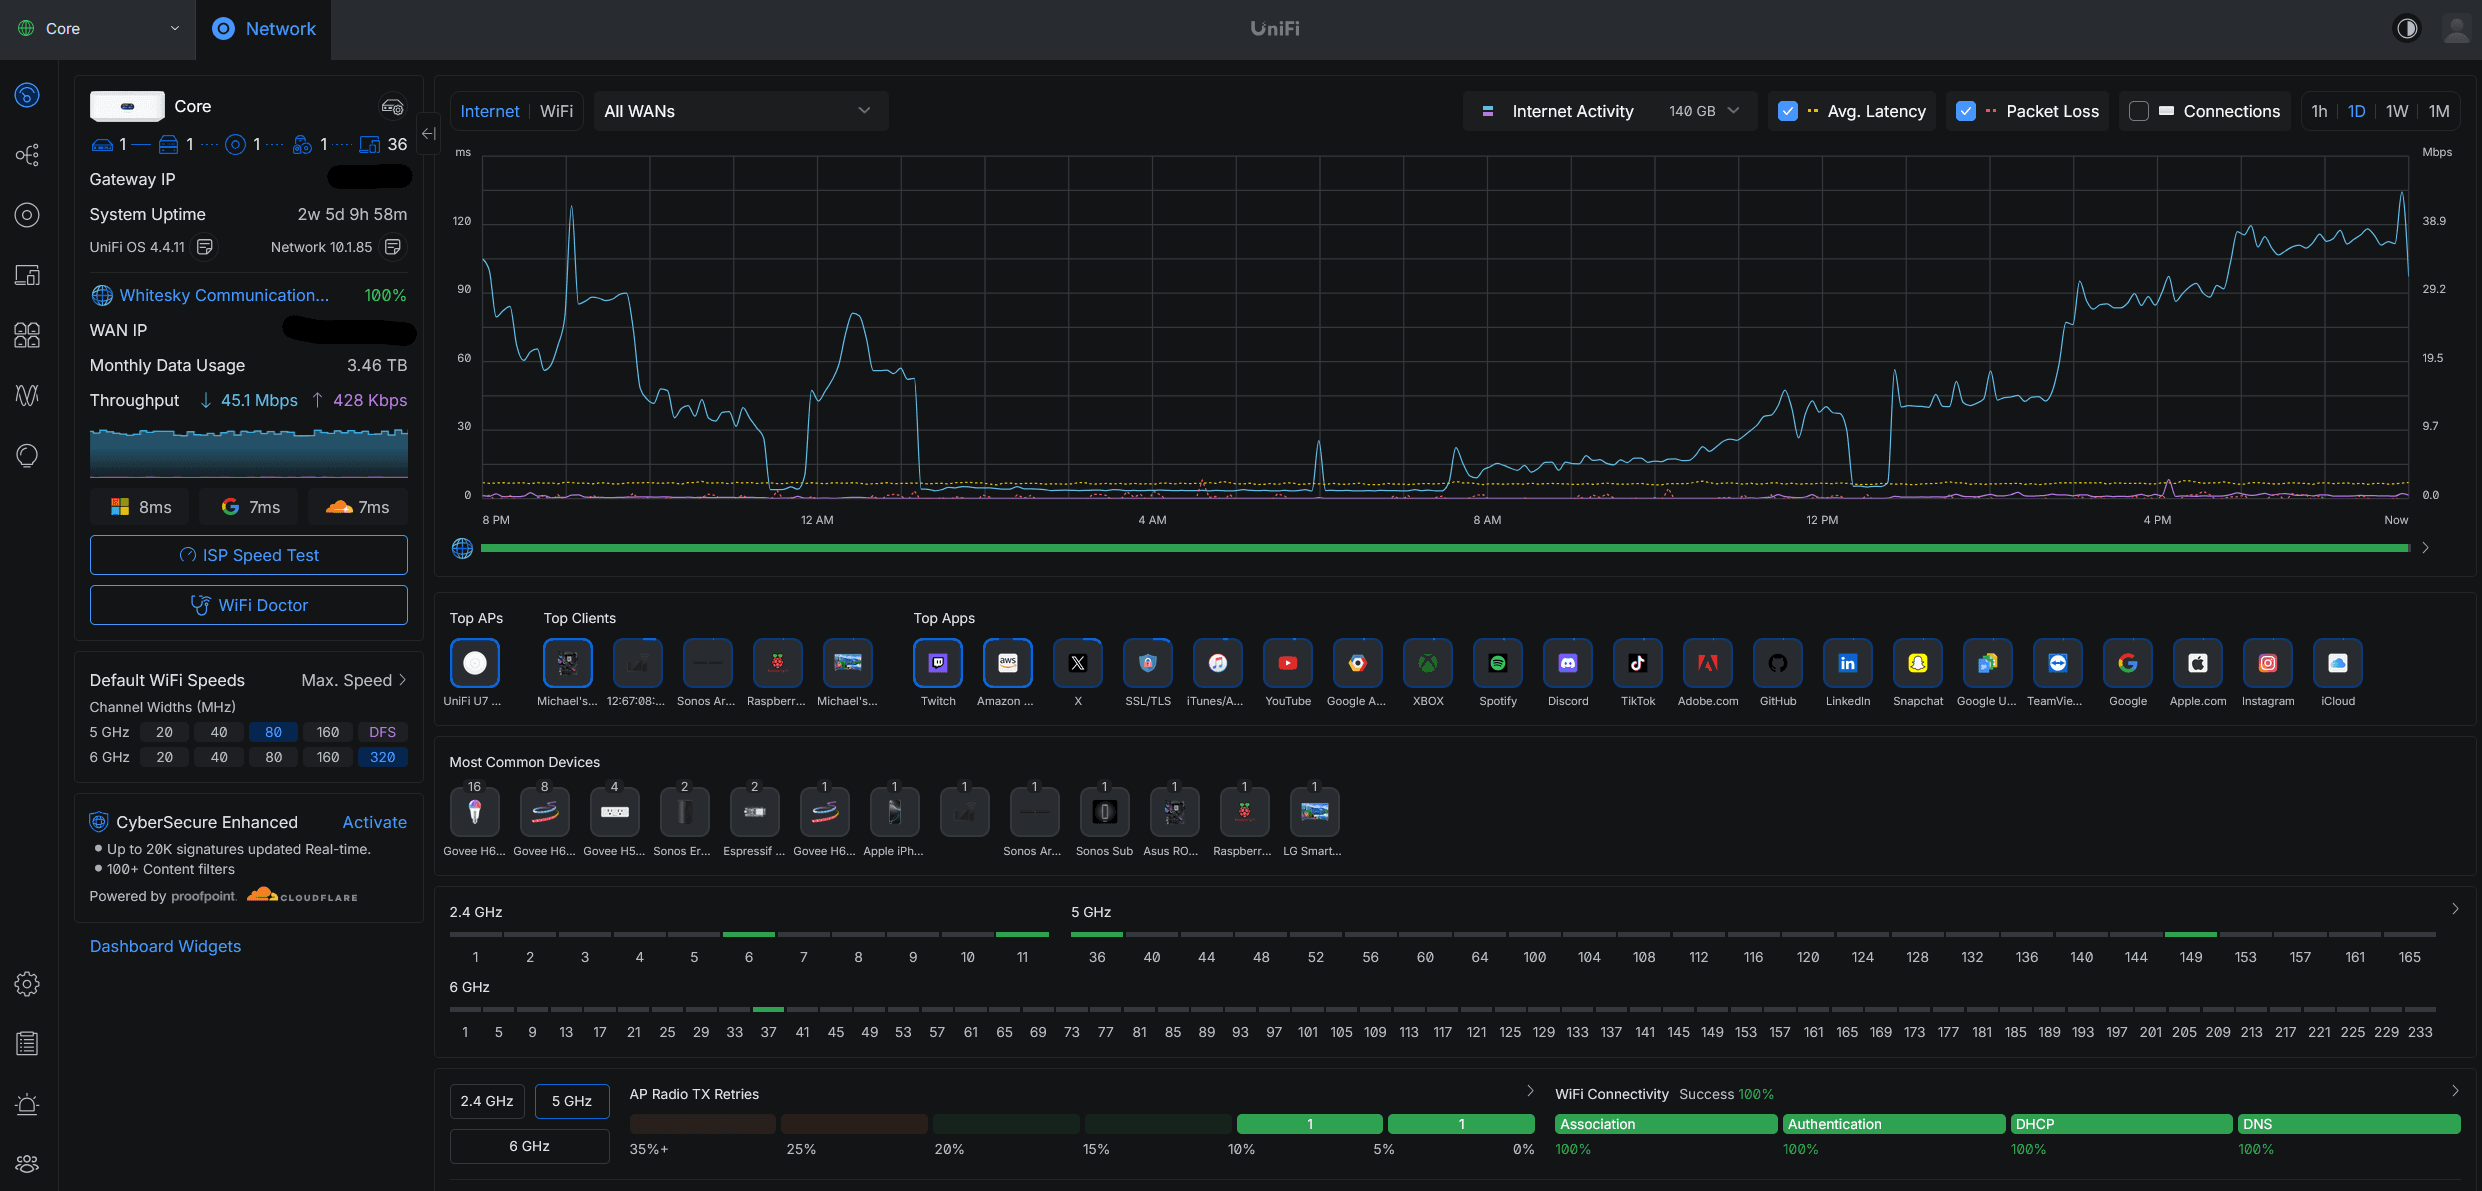
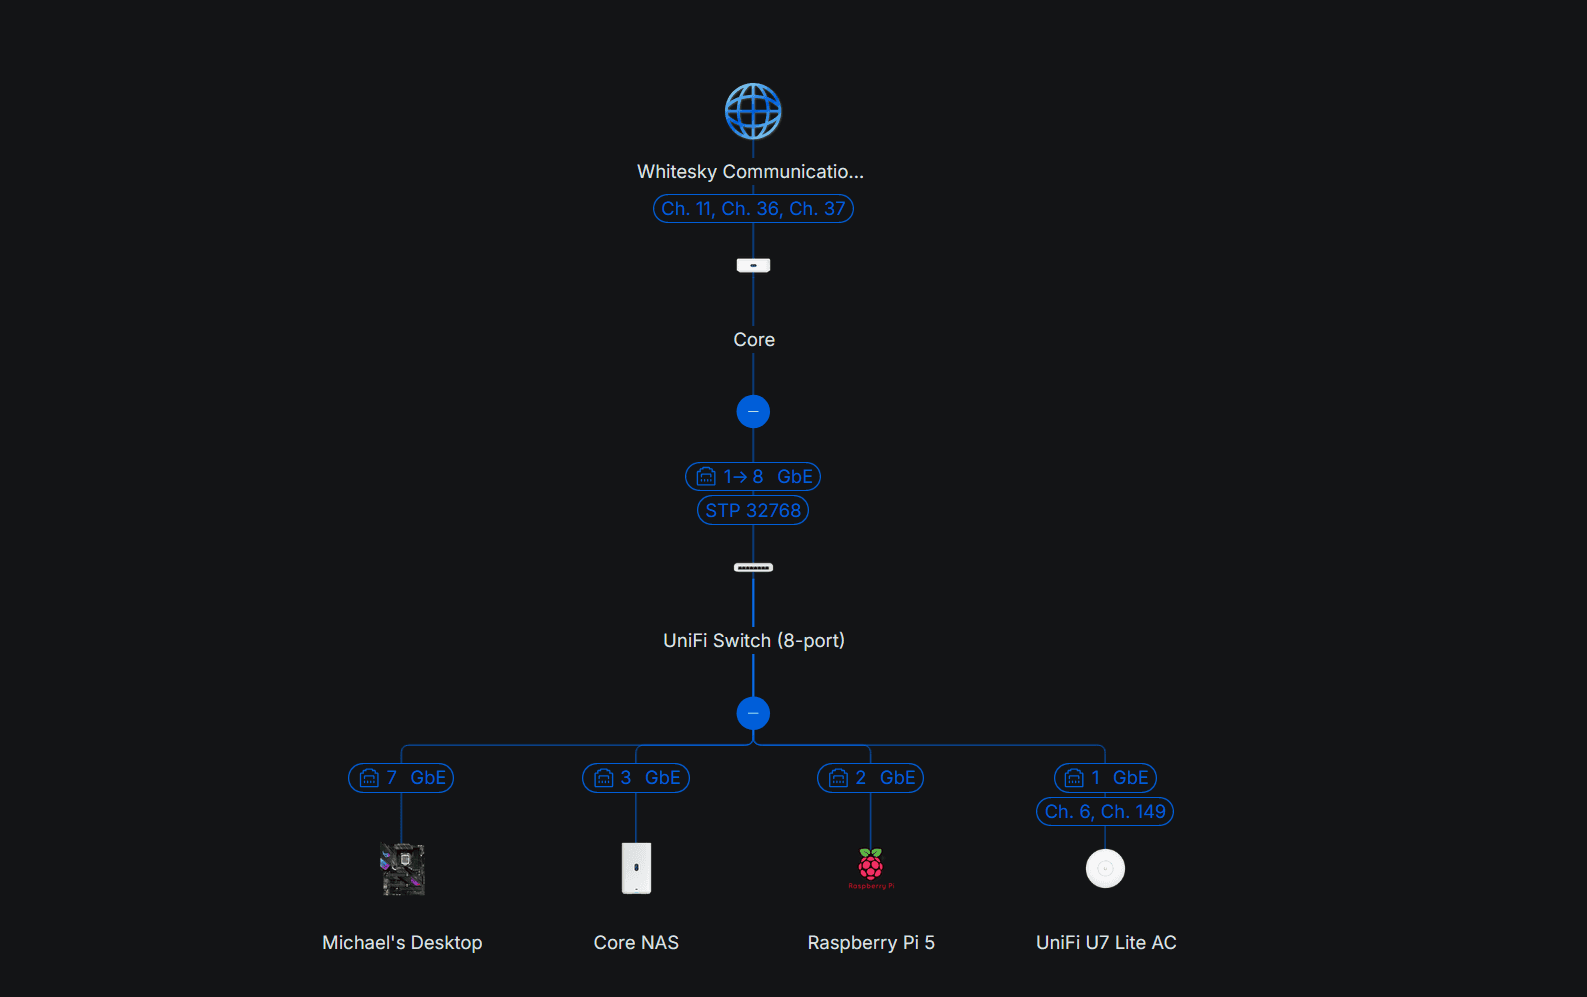
The foundation is a Ubiquiti UniFi Dream Machine (router), a managed switch, and multiple access points. Rather than putting everything on one flat network, I segmented traffic into four VLANs:
- ◆Admin VLAN - trusted devices: laptops, phones, NAS
- ◆IoT VLAN - smart home devices: lights, sensors, cameras
- ◆VM VLAN - virtual machines and homelab services
- ◆Guest VLAN - isolated internet-only access for visitors
Firewall rules block all cross-VLAN traffic by default. IoT devices can only talk to Home Assistant; they cannot reach the Admin network.
Home Assistant on Raspberry Pi 5
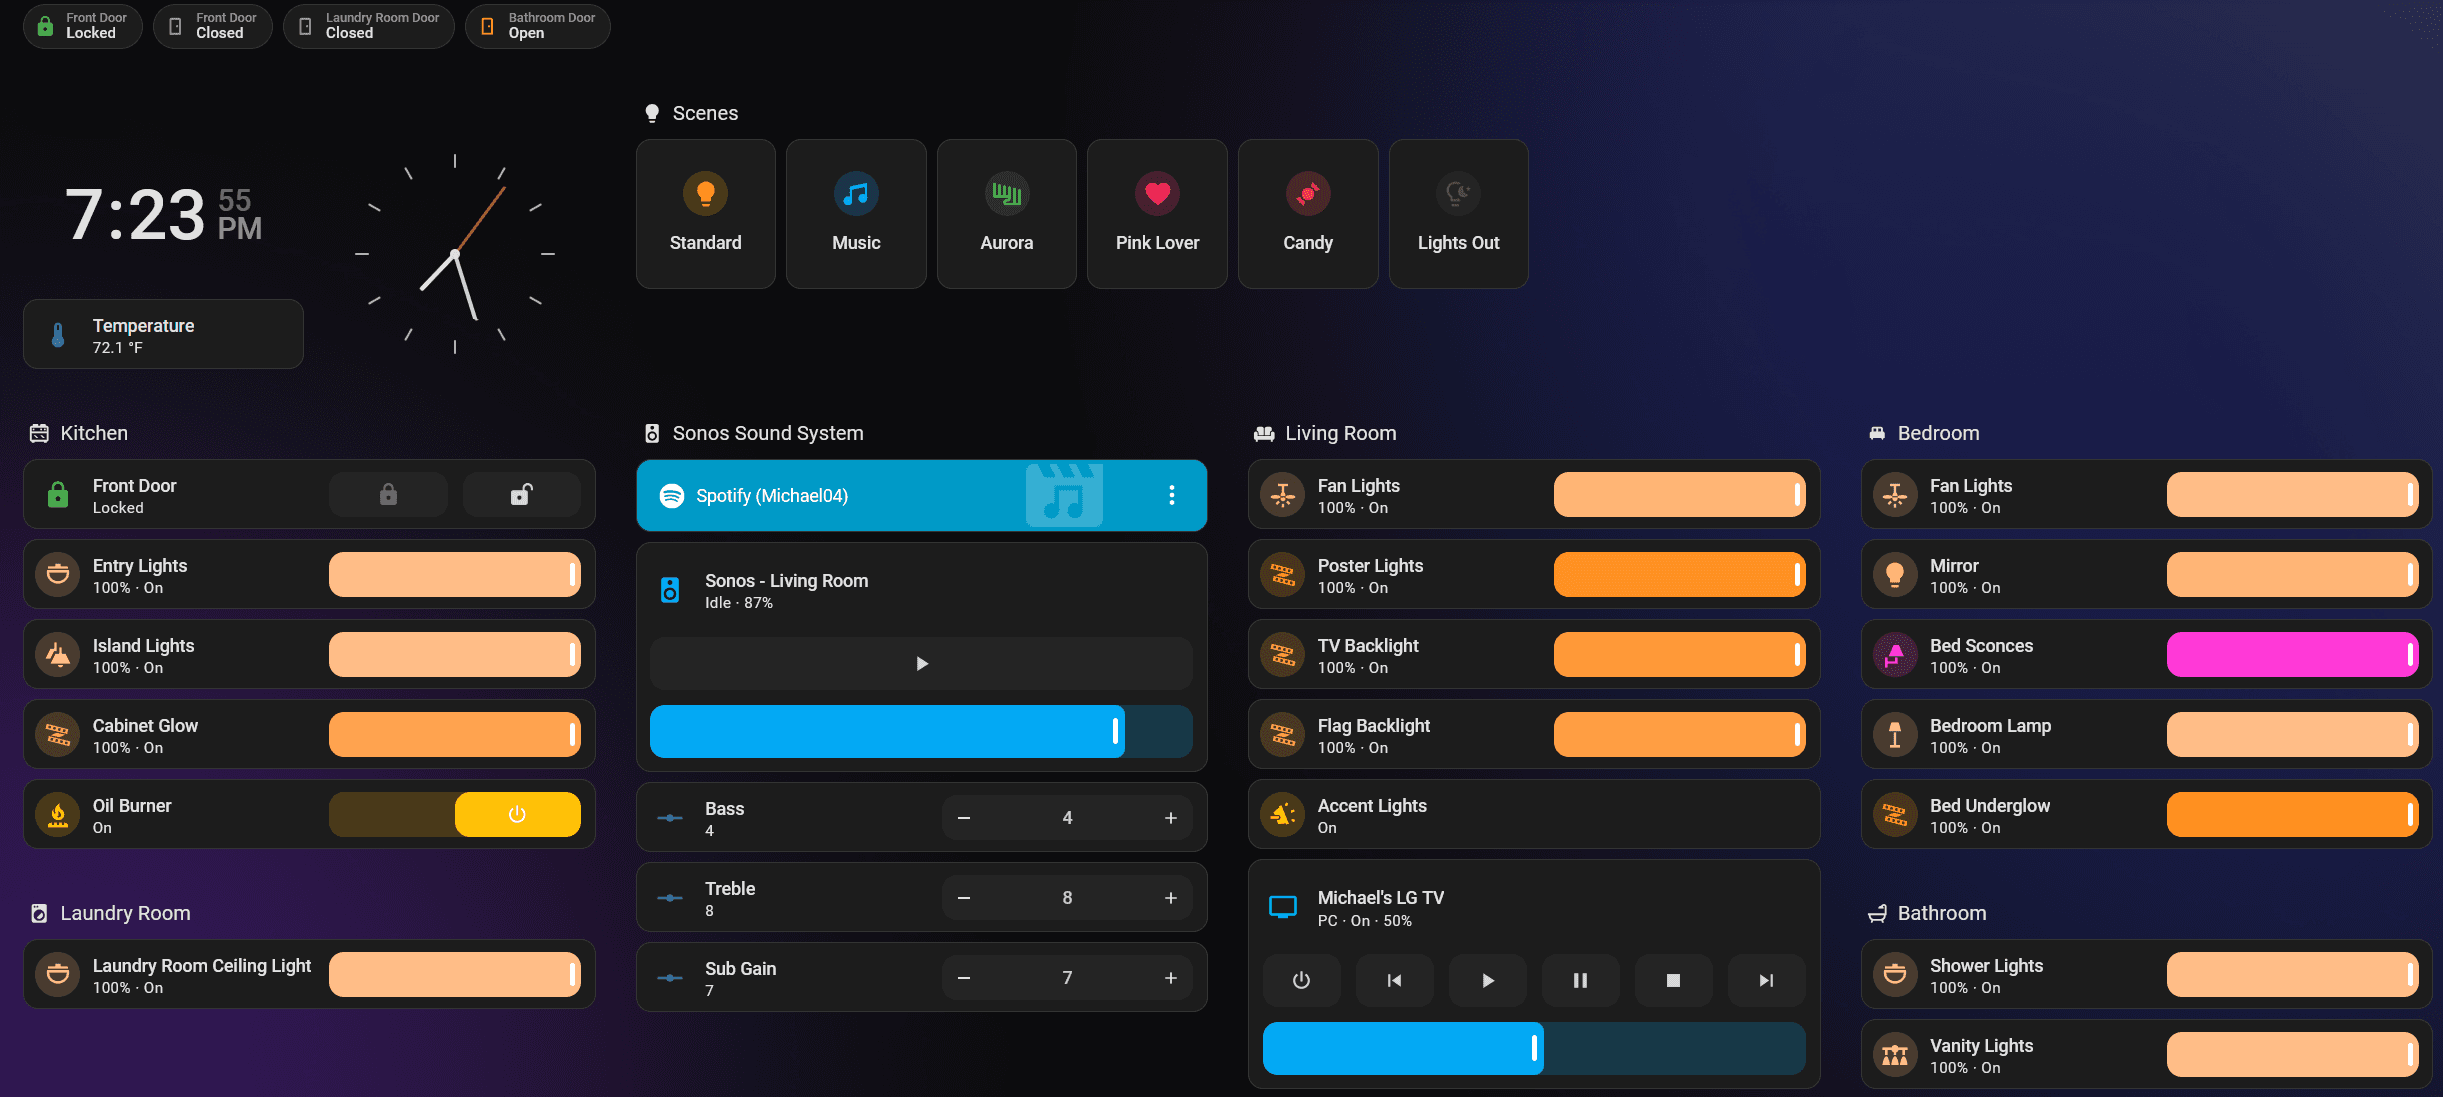
All smart-home devices - lights, thermostats, sensors, and cameras - are controlled through Home Assistant running on a Raspberry Pi 5. The Pi5's extra horsepower handles real-time automation, local voice control, and custom dashboards without cloud dependency.
- ◆Motion-triggered lighting scenes
- ◆Presence detection via phone GPS + Wi-Fi probe
- ◆Energy monitoring for every outlet
- ◆Automated morning/night routines
NAS and Homelab
A TrueNAS box on the VM VLAN serves as the central storage layer - Plex media, VM disk images, backups, and Docker volumes. Everything is on ZFS with automatic snapshots.
The homelab runs several self-hosted services in Docker containers managed through Portainer:
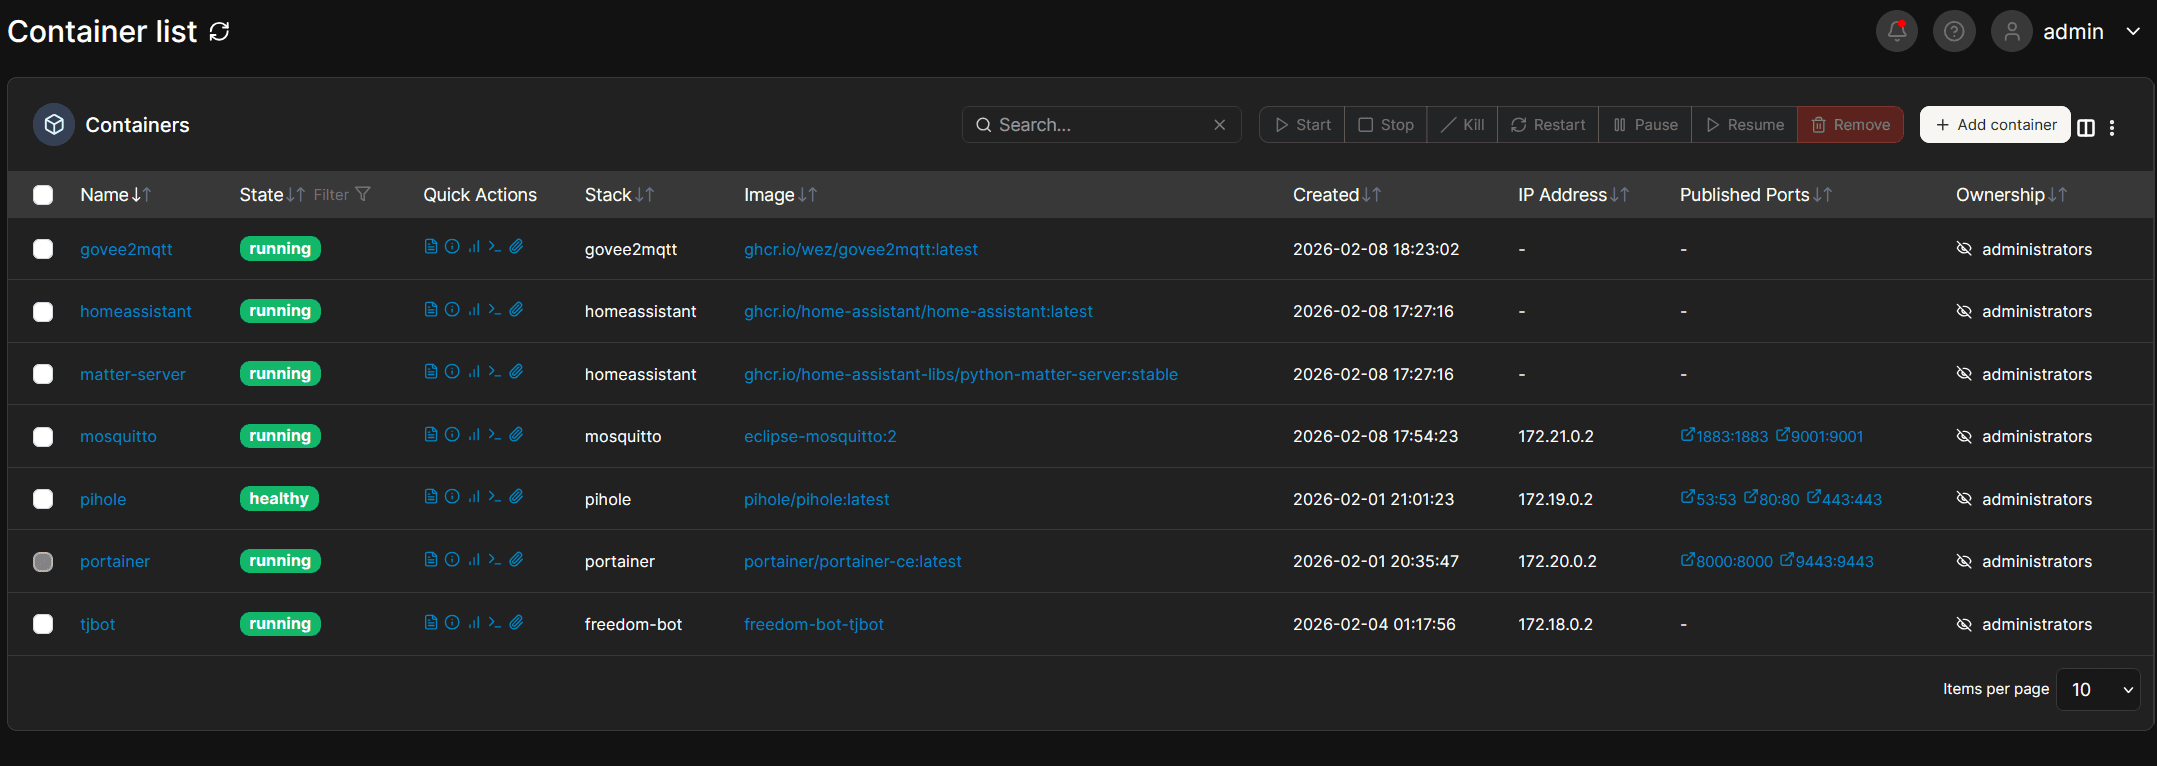
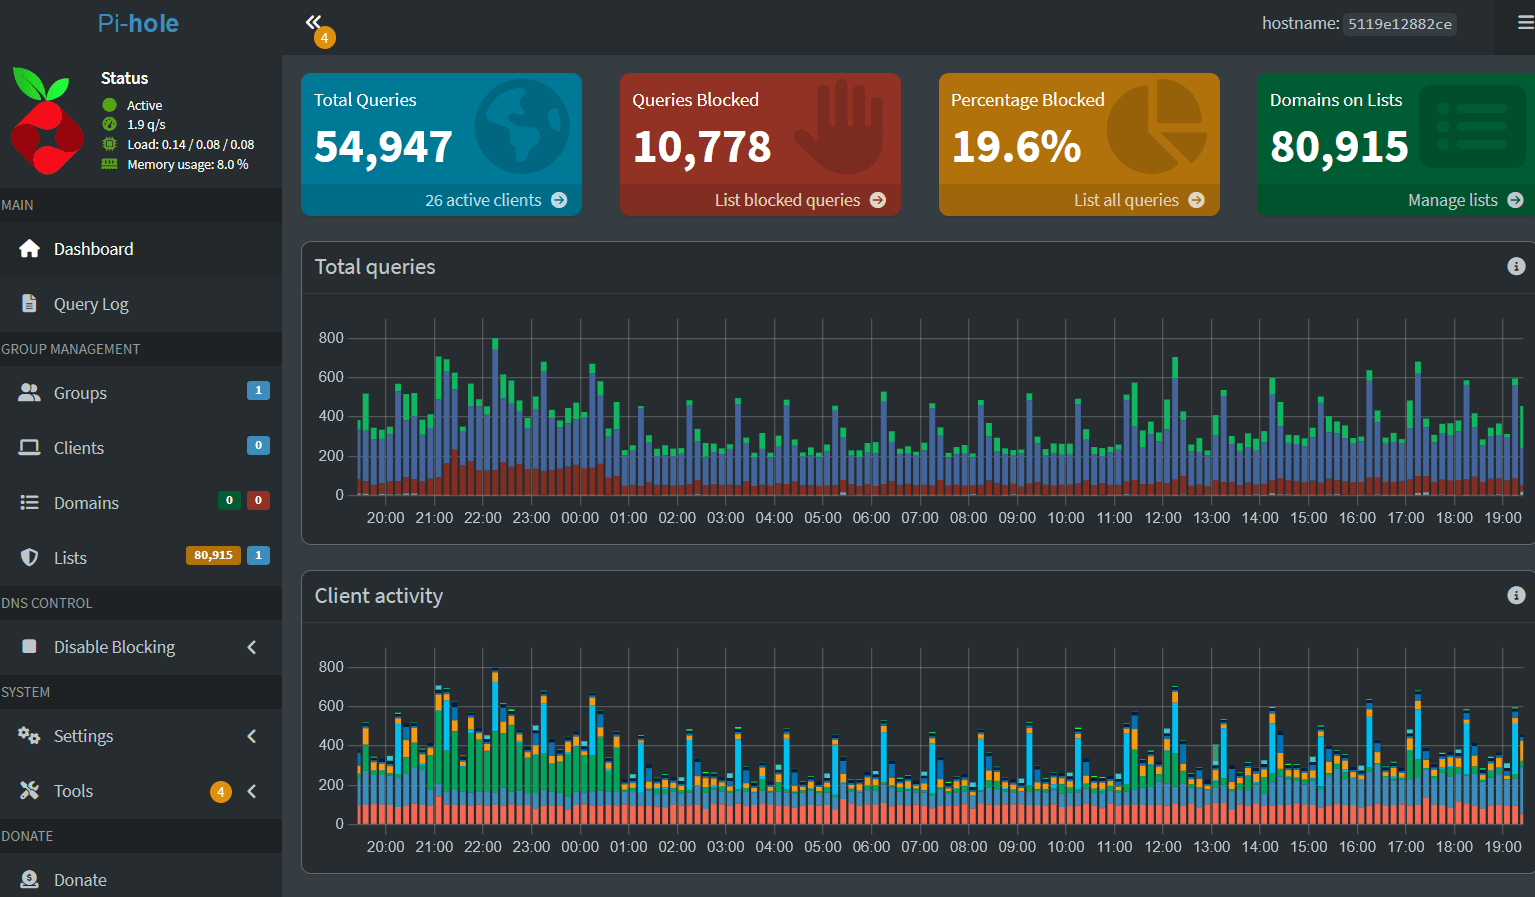
Pi-hole - Network-Wide Ad Blocking
Pi-hole runs on the Pi5 alongside Home Assistant (in Docker), acting as the DNS server for the entire network. Every request passes through Pi-hole before hitting the internet, blocking ads and trackers at the DNS level across every device - no browser extensions required.
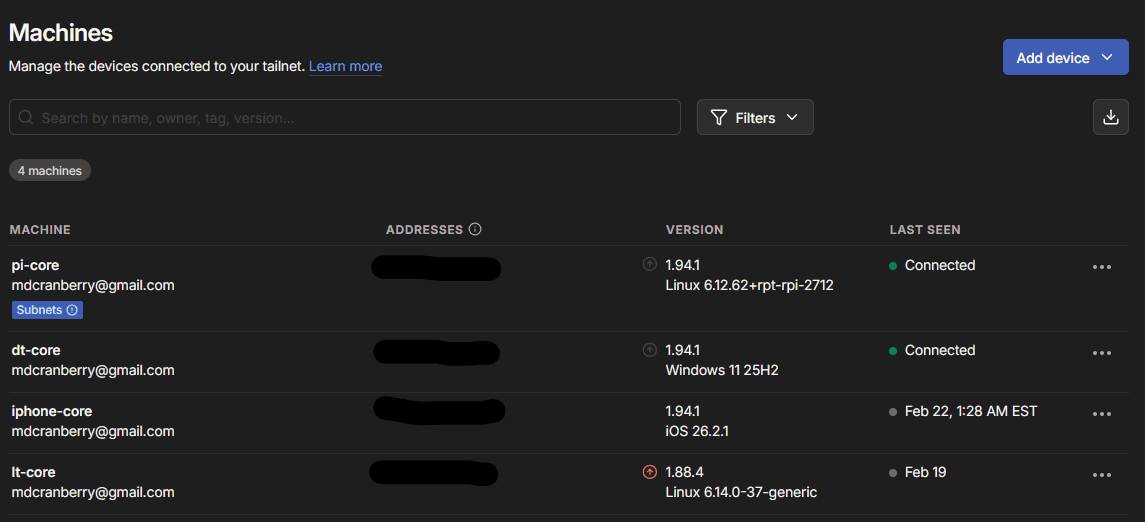
Tailscale - Secure Remote Access
Tailscale creates a WireGuard-based mesh VPN across all my devices. Whether I am across town or internationally, I can securely access my home network, NAS files, and Home Assistant - no port forwarding and no exposed ports.
The exit node on my homelab also routes all my mobile traffic through Pi-hole when I am away from home.
Summary
- ◆Segmented, secure networking - IoT devices cannot touch my admin network
- ◆Full smart-home automation - local, no cloud dependency
- ◆Network-wide ad blocking - everywhere, all devices
- ◆Secure remote access - Tailscale VPN from anywhere
- ◆Centralized storage - NAS with ZFS snapshots
Total cost was roughly $800 in hardware spread over two years. The ongoing running cost is under $15/month in electricity.